Enthusiastic netizens share their personal experience of grout. It is simple and feasible
author:admin 2024-08-13
I believe that many owners know that there will be small gaps between tiles during decoration. If they are not sweetened, they will definitely be a place for dirt and dirt to hide in the future, and they will not look beautiful. At this time, we need to do a job -- grout.
In fact, grout is very simple. We don’t need to hire a special grout worker. We can do it ourselves. Today, I will share with you a netizen’s personal experience of grout. I hope you can learn it after reading it!
Step 1: Clean the joints.
Because of the need to beautify the seams, the mason will leave corresponding gaps when laying tiles, but over time, all kinds of dust, cement mortar, etc. will remain in the gaps, and some will even fill the gaps, which will affect the effect of the beautification. Therefore, you need to use tools to clean the gaps, and don't clean them too deep (of course, if you are a rich man and don't care about the loss of the beautification agent, you can go deeper as much as you want). According to the instructions of the beautification agent, it is enough to leave 2~3mm, but this is more difficult to grasp. Generally speaking, it is enough to clean the gaps slightly, and it is ok to leave some space for the beautification agent~

Step 2: Clean the surface of the tiles.
I didn't take a photo of this step, but you can roughly imagine it. Anyway, there is a lot of dust after cleaning, and there may be stains on the original tiles. Try to wipe them clean to prevent the dirt from getting on the beautification seams, which will not be removed after drying.
Step 3: Paste masking tape
In fact, some owners also said that they can directly construct without applying masking tape. Of course, this requires good skills first, and the other is that the requirements for tiles are relatively high. Polished tiles and glazed tiles should be tried, but matte tiles and antique tiles are not worth trying. I advise everyone who wants to do the grouting by themselves, but has little experience, to try to apply masking tape. Although it takes some effort, the effect is good, and it will not affect the tiles.
Apply masking tape and then apply glue, and the effect can be seen on the same day. If you don’t apply it, you have to wait for 12 hours for the grouting agent to completely solidify before you can clean the remaining grouting agent on the tiles. After all, there is an old saying that the first effort is the best, the second is weak, and the third is exhausted. For this kind of work with a large workload, it is best to complete it on the same day.

It is recommended to paste the masking tape at a 45° angle, which saves materials and is more convenient to tear off later. You can refer to it.

Here are some large photos of the bathroom with masking tape:
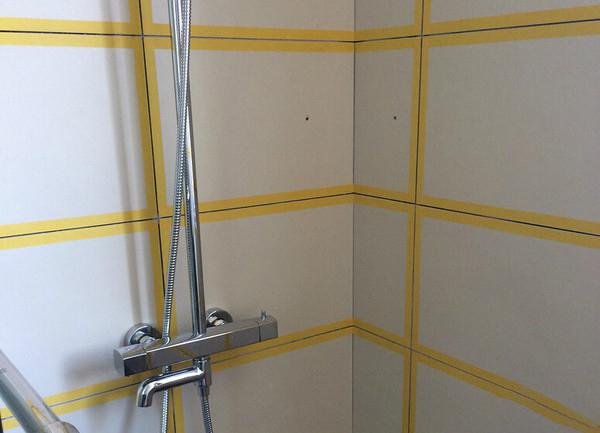
This wall is pasted straight, not at a 45° angle, and it is all pasted. It is not easy to tear it off. It is recommended that you paste it at a 45-degree angle.
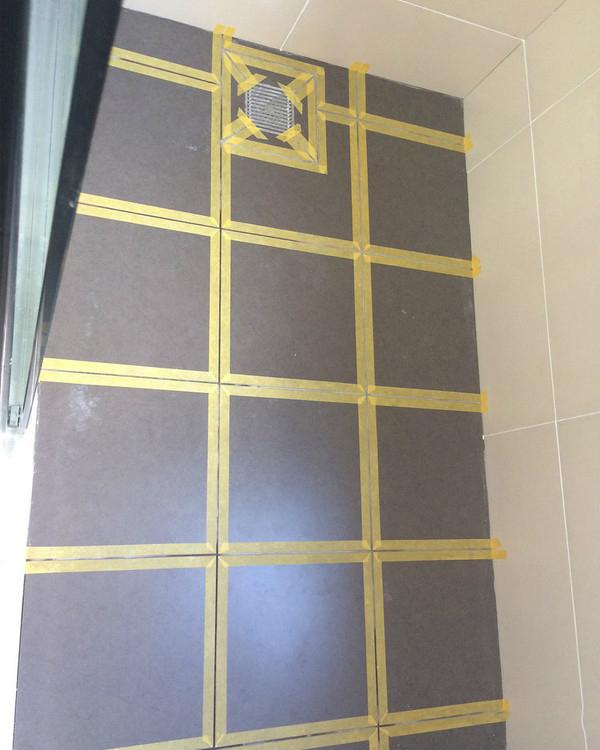
The floor is pasted in the way recommended by the editor. Isn’t it a very standard 45° mosaic? It is indeed more convenient to tear it off. Recommended.
Step 4: Put on the glue gun and prepare to glue.
The caulking agent used is a two-component real porcelain glue, which is difficult to apply, so the glue gun is very important. It is best to buy a labor-saving glue gun. Generally, sellers should give it away as long as you buy a lot. I have used ordinary glue guns, which are very laborious to apply, and the strength is not easy to control.
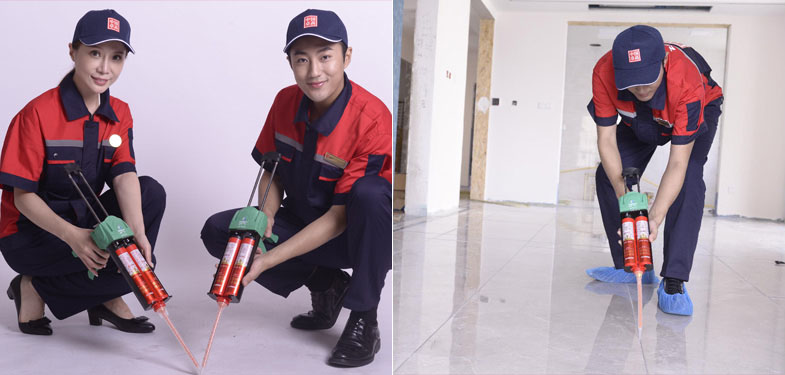
The labor-saving glue gun is shown in the picture below:
After the AB materials are fully mixed, you can prepare to glue. After applying the masking tape, it is quite convenient to apply. Just fill the gaps. It doesn't matter if it is not very even. It will be processed in the end. Just make sure that every gap is applied.
Step 5: Scrape the gaps flat and tear off the masking tape in time.
Two small tools are used here, which feel quite practical. One is a small scraper, which is also given by the seller. It is small but very useful. Let me show you a picture first.
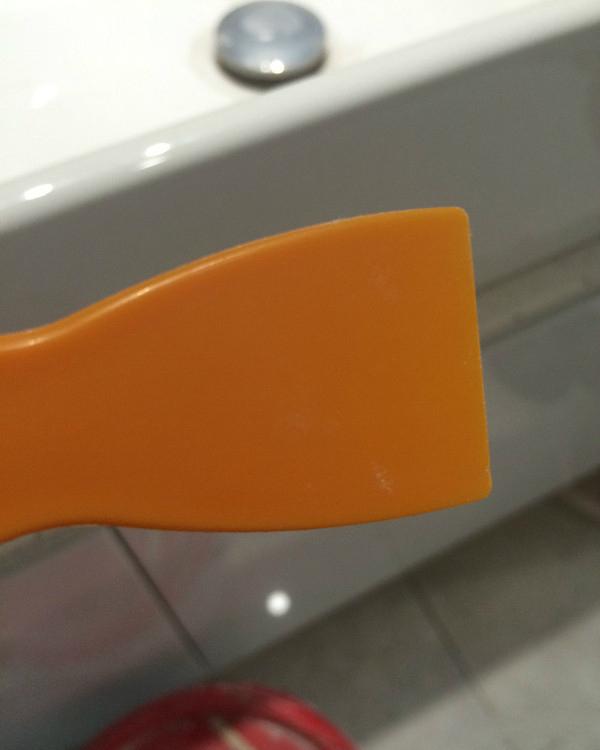
This is used to scrape the gaps flat, so that beautiful gaps can be produced one by one, instead of the kind of lumps that appeared when applying glue just now, haha. (And, I'll tell you secretly, you can use this small scraper to fill the excess caulking agent into other gaps that have not been applied yet. The operation is the same as caulking. It is very convenient and can save a lot of materials.)
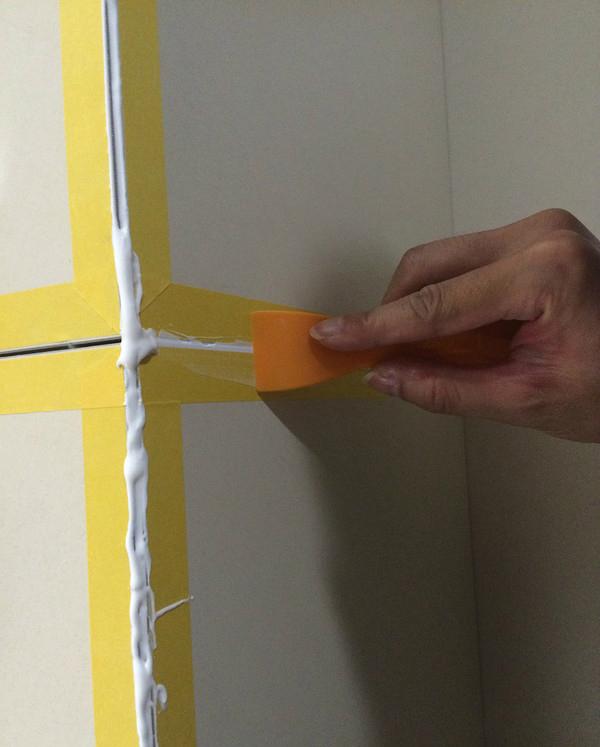
The other one is the caulking edge ball. This is specially bought. The price is not expensive. It costs about 10 yuan each, which is also very practical. In fact, it was already very flat after scraping with a scraper, so why do we need to do it again? The reason is quite simple. The masking tape is actually of a certain thickness. Scraping with a scraper can only ensure that the gap is flush with the masking tape. Once the masking tape is torn off, the gap will feel slightly protruding from the tile. The caulking should be recessed a little to look better. For real porcelain glue like this, because it will not collapse, you can only make it recessed a little bit at the beginning, so the edge pressure ball is used. This is a ball. Use it to scrape along the gap to ensure that the gap is flat and recessed, and the effect is great~
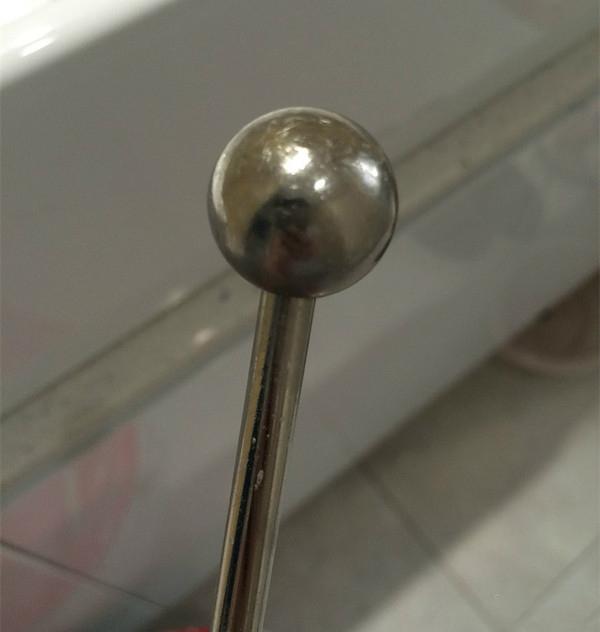
One thing to note when using the edge pressure ball is that you must wipe the ball clean after scraping it once, otherwise it will be unclear if it sticks. The caulking agent on the ball will roll back into the gap, and the work just now will be in vain. (Towels and napkins are both fine, but it should be noted that this cannot be washed off after drying, so it is recommended to use paper towels.)
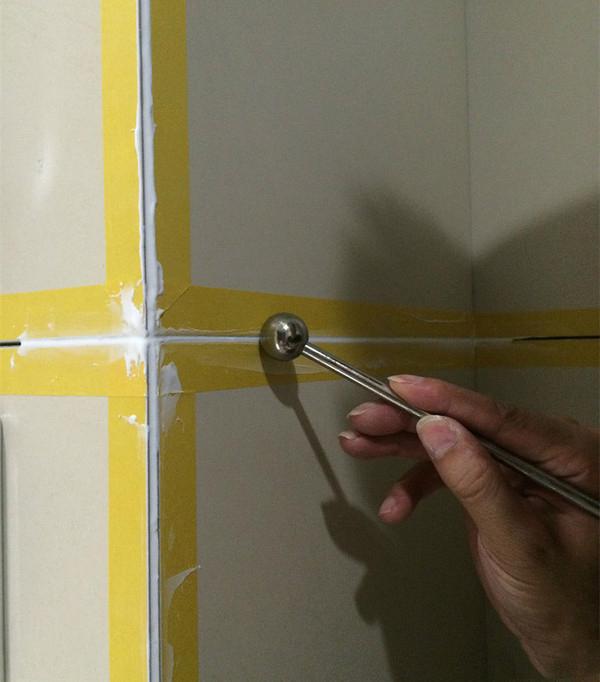
Do these actions as quickly as possible. After scraping the gap, you should quickly tear off the masking paper. The caulking agent actually dries quite quickly. If you wait until it is a little dry before tearing it off, some of it may be brought out by the masking paper, which will be ugly.
Look at the remains of the masking paper that was torn off these two days, it is also quite spectacular~
